
Fun, easy patterns for all seasons!
Tuesday, October 16, 2012
2012 Quilt Show Entries
 2:53 PM |
  Posted by
Nutmeg Quilts |
Posted by
Nutmeg Quilts |


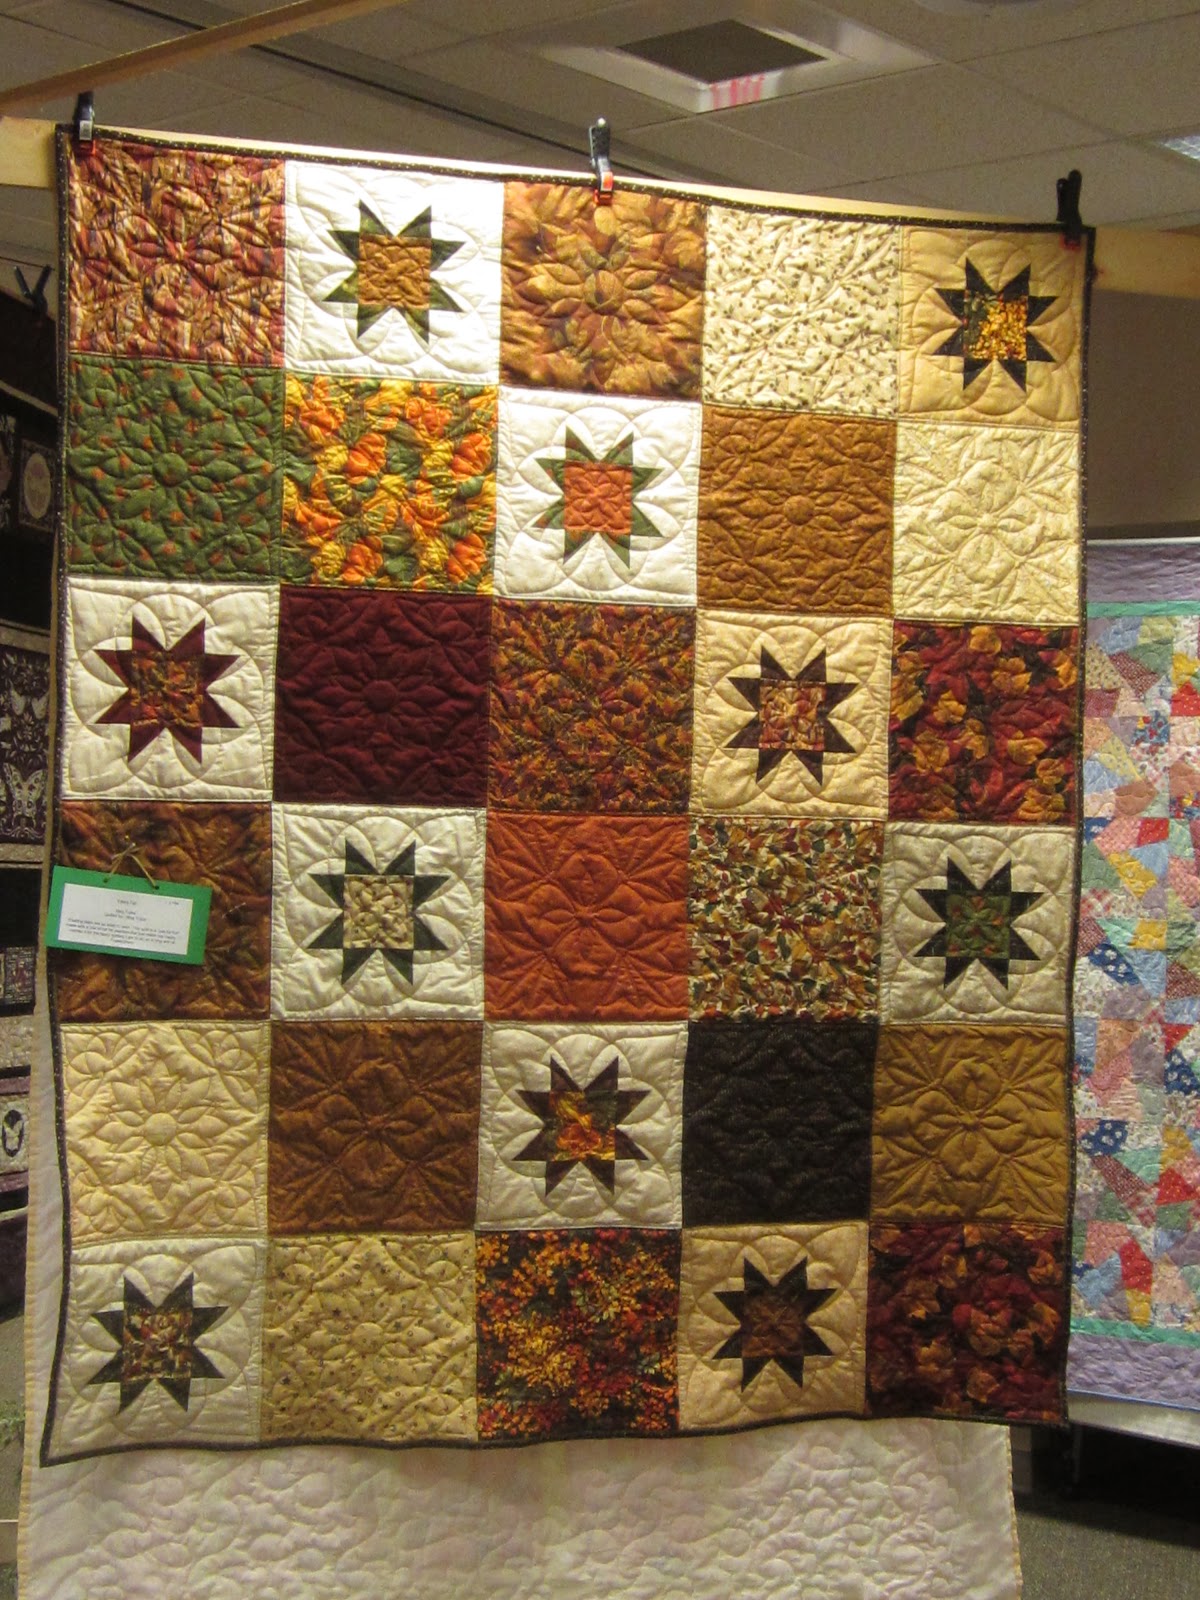
This is my latest original creation, Trinity. It is mainly hand embroidery! And yes, that is a first place ribbon on my little quilt, of which I am SO proud, because you just don't understand the talent in our wonderful guild. I was so honored to get a ribbon, and this one is very meaningful to me!
Honestly, I was compelled to make this quilt. I used to ask myself what my ideal job was. It had to be creative, I would be my own boss, work on my own schedule, and spread the Word of God. This fits the bill, and I hope to publish this as a pattern in the near future. If you hand embroider, or know someone that does, please share this with them. Don't hesitate to give me feedback as well.
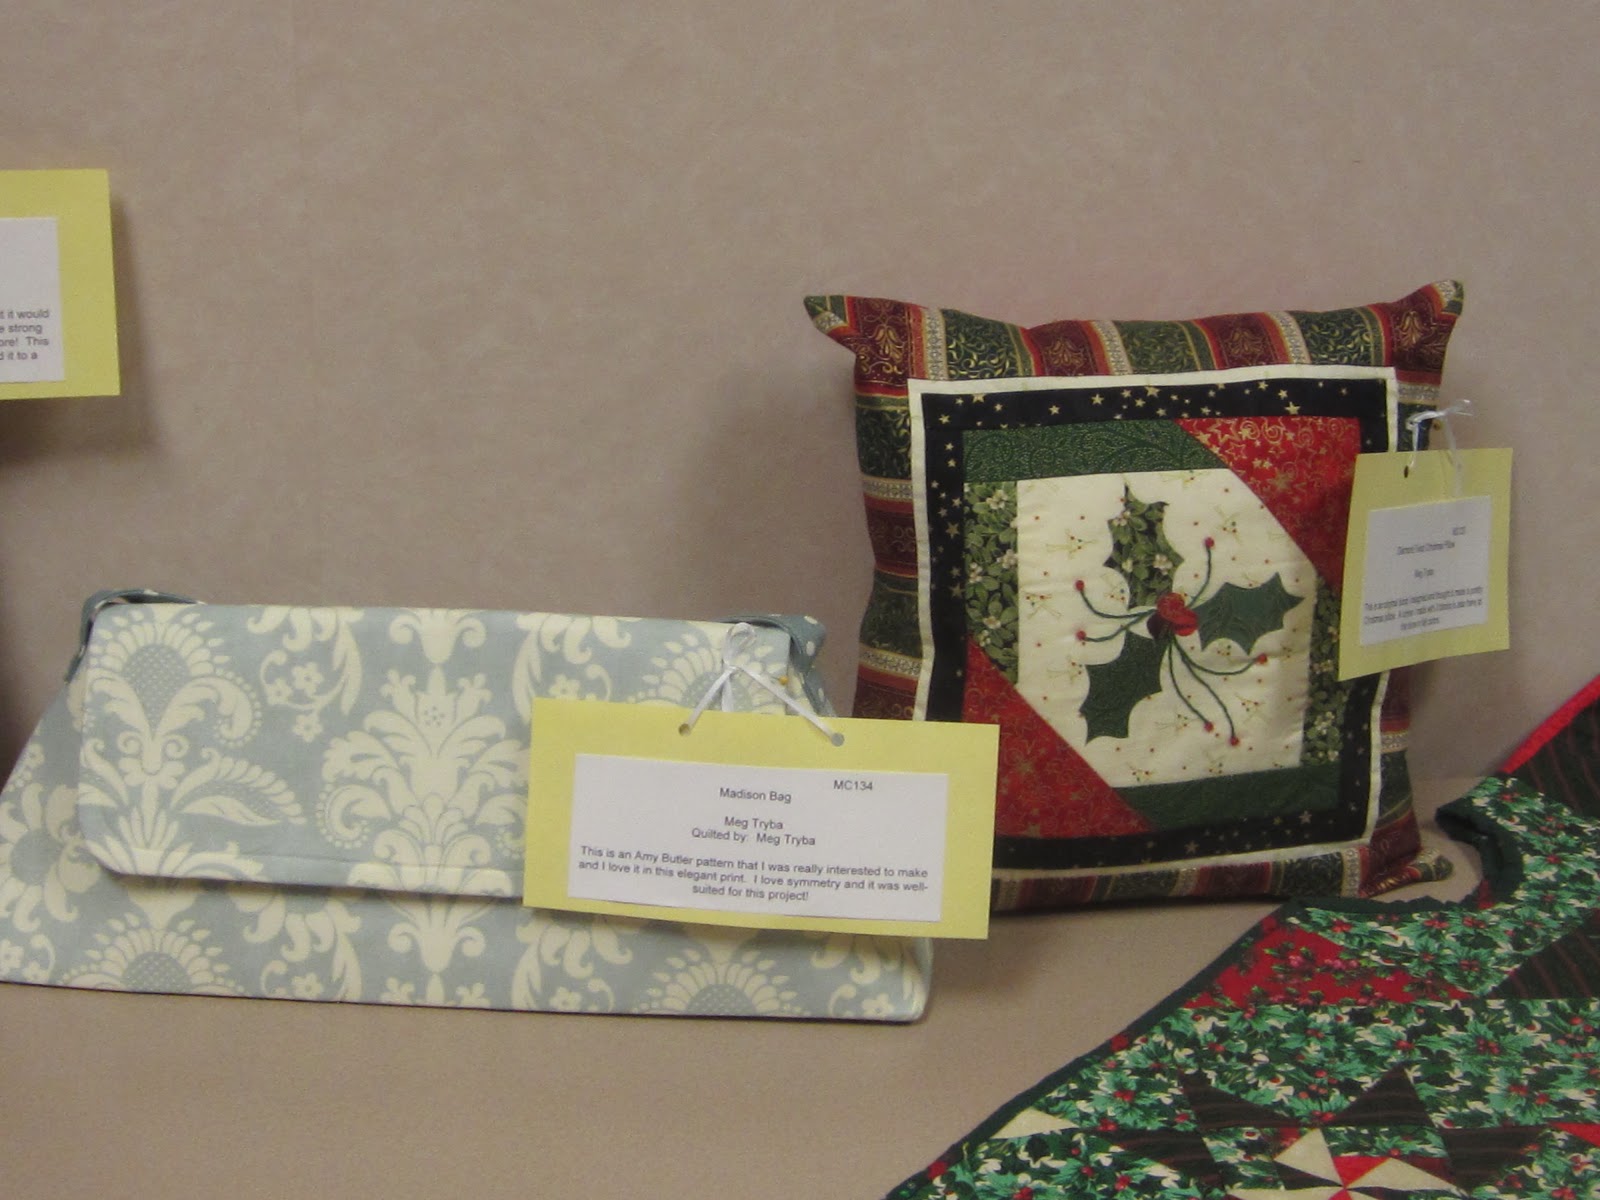
 This is my new design called Diamond Twist. It is a table runner (with a 3rd place ribbon - very exciting,) and this one features hand appliqué and couching. If you scroll back to my last blog entry, you'll see it shows a red, white and blue quilt with close-ups of the machine quilting around embroidered flowers, and this is the same quilt pattern. How different they can be! Now, take a look at the photo below, and you will see a Christmas pillow, that is the same block, with appliqué and beads! I love the versatility of lights and darks and of varying color ways that give you multiple moods and purposes, just with fabric choices!
It makes me want to revisit patterns and makes me feel like I'm getting more for my buck, and we all like that.
Sorry, it must be "toot my own horn day" or something.

Thanks for stopping by, and Happy Fall!!!

Thursday, August 23, 2012
 Here is a close-up of some free-motion quilting in progress on my new table runner pattern, Diamond Twist, coming out this fall! I am still continuing the hand embroidery, and machine quilting around it and within the flower petals was so much fun! I love the dimensionality it brings out - really makes that flower pop to life!
I do things a bit differently than most, I suspect: I first pieced the runner, then basted the batting in place, so I could hand-embroider the flowers with a bit of cushion behind them. Next, I machine quilted, then removed the basting stitches, and trimmed the quilt so it was ready for binding.
 When this runner is constructed, you get these fun little bonus units, and with just a little extra patchwork, you can create these bonus blocks, also with a twisted look - aren't they cool? Totally worth a little extra work and make great coordinating pieces!
Saturday, April 7, 2012
Perfect Palette
 Happy Spring! Hyacinths and rhododendron blooms are some of my favorite shades of purple. Color is one of those things by which people are baffled. I am often asked for advice on color sense and combinations. If you're stuck, take a look outside. There are no mistakes in nature - my dear mother taught me that when I was young. She was right, and it has always stuck with me.
 Sunday, April 1, 2012
Embroidery Bug

P.S. Are you wondering about those red lines all over my stitchery? They come
right out when you apply heat! Yet another reason I am thankful to live in
this age of technology and convenience.
Wednesday, December 14, 2011

http://tlcstitches.blogspot.com/2010/07/faux-piped-binding-tutorial.html?spref=fb
Thank you TLC! I love how this turned out, and it was just the right touch to finish this wonderful quilt.
This project was a "Round Robin" amongst friends that are also members of my quilt guild. I constructed the center block which is a variation of the block called "Old Favorite" and by doing so, declared that this would be a 30's scrap quilt. I then passed it on to Linda, the next member of the group of 5. We pulled the name of a border technique out of a hat, and got sawtooth, so she added a sawtooth border and passed it on. Don't you love that little stripey fabric in there? It is the cutest. (See close-ups below.)

Applique was expertly done by Nancy, and need I say more? Kay cleverly echoed the sawtooth border design and I really think this helps tie it all together. Lastly Jean added the border with the rounded corners - something extra fun and unique for this quilt! Love it!!!
 I went to the quilt shop to find fabrics for binding, and came home with three. I also had a blue gingham which I did not use. I chose to do the yellow piped "look" because it separates the pink in the corner detail from the pink binding.
This technique is so easy, and even allows machine sewing for the final turning. I did NOT hand finish the binding. You gotta try this! I think I'm going to do all of my bindings this way now!
Don't you just love it when you get excited about a new technique that saves time, and looks great? I do!

I really put a lot of thought into quilting this quilt, and I am pleased with the results. God bless the makers of water soluble ink pens. They are marvelous and my little blue Clover pen is a cherished notion that obeys me well. Every time I say that prayer "Please let it really not stay blue" it listens every time. A few squirts with the spray bottle and we are back to pristine parchment!
Sorry for being heavy on the pictures today. It is just a quilt that needs to be celebrated because it was so much fun and inspired learning and solidified friendships.
Thank you Linda, Nancy, Kay and Jean for this wonderful project! Wanna do it again? :)


Monday, September 26, 2011

Here are some motifs from the Meadowlark Panel by Benartex. This line is filled with creams, beiges, rich plums, lavendars and blacks! I love it! It is so elegant and being a purple girl it makes me way excited. I took these squares and framed four of them with cream colored strips to reoncile them to the proper size. They will become four sampler blocks. The first one is below.
This block looks three-deimensional when you place the fabrics carefully!
Click above on "Connect with me on FaceBook" to see the overall layout picture!

Please note that this block is sitting on top of a quilt with a green backing. I'm not putting green in this quilt, it just made a solid background for me to take the photo. :)
Sunday, June 26, 2011
Batiks Taking Form


Here is the center of the quilt. It is a completed block now, and the rest is coming together. I will show you more at a later date!
Tuesday, June 14, 2011
What have I been up to? Finishing projects!
Here is a picture of my son with his teacher and the
table runner that I made for him. It is the smaller size version of my original pattern, Sweet Sisters, available to view on my website. And, yes, he is a Packer Fan as is our family. (He earned big brownie points for that!)
 Thank you Mr. Johnson, for a fabulous first year of middle school for RJ! We think you are terrific!
table runner that I made for him. It is the smaller size version of my original pattern, Sweet Sisters, available to view on my website. And, yes, he is a Packer Fan as is our family. (He earned big brownie points for that!)

Wednesday, March 9, 2011
Simple Table Runner

I absolutely LOVE WILLIAM MORRIS!!!! I don't know if he was ever knighted but I would call him "Sir William" in a heartbeat. I think he is one of the most brilliant designers ever. He was known as the father of the Victorian Era, and rightfully so.


Thankfully, I can have him immortalized in fabrics. I created a quilt for my mother and these squares and these color shaded gradation strips were left over. What to do? I knew exactly what to do! I just HAD to make this for my cousin, Kathy, as a thank you for her hospiatlity on our family vacation last year. She lived in the UK for a time, and also fell in love with Sir William.
Is it the colors? The symmetry? I don't know. I think it's that eye-pleasing complexity that we are awed by. We can't create elaborate, incredible designs like this without a computer, yet he did. And he did it to perfection! It must have taken incredible amounts of time and tenacity. The things that we are constantly putting into our quilts! I however, must do it because it is my art and my passion. What drives us to put in the time? Love of the craft.
So here's to the time and talent commited by us to make beautiful quilts. I think it is a tribute to those who have gone before us and of course, to those who enjoy the quilts!

Saturday, February 26, 2011
What is on your Design Wall right now?
So find some wall space, and get your designer hat on and lay out some of those old orphan blocks you have. I know you do....make a wall quilt out of one by adding some nice pieced borders, or put those extra blocks from that exchange into a wall quilt and give it as a gift. Not enough time? Sew them into a pillow top and it'll be done lickety split. I'm tellin' ya, that design wall will get a spring in your step and you'll see a creative difference! Post a photo of what is on your wall - we all need inspiration!
 |
| Churn Dash blocks that will become a (much bigger) "Caring Quilt" for the guild |
A design wall is something I never thought I would use. But suddenly I took a class and there it was in front of me, and I knew I had to have one at home, too. What did I do? I invested a whopping $3 bucks on a flannel-backed vinyl table cloth and hung it up in my craft room. Fabric and blocks automatically stick to it and if one day they don't, I'll give 'em a shot of basting spray and we'll be back in business.
This is an incredibly valuable tool for a visual person and a designer like me. Why? Somehow, putting colors together goes much better if you can stand back and look from afar. Flipped blocks and little mistakes jump out at you as well, if looked at from across the room.
Friday, February 18, 2011
Knitting and Purling Patterns
 Basic knitting patterns are comprised of knitting and purling. Stockinette stitch is the most common stitch there is. I guarantee that you have a sweater in your closet right now that is composed of stockinette stitch. If you study it for a moment you can determine the knit side (likely the outside) and the purl side (likely the inside.) When you knit a stitch, you see a small "v" on the front and a "bump" on the back. The front is known as the KNIT SIDE, and the back is known as the PURL SIDE. Subsequently, when you purl on one side, a knit stitch appears on the reverse side.
 How do you do the stockinette stitch?
Knit the first row; Purl the second row and repeat. Work is turned between rows. The above photo shows the progression of these stitches beginning at the bottom and going up. The second section is seed stitch.Seed stitch is a nubby texture and happens to be my favorite. To do the seed stitch you simply K1, P1, and repeat. On the next row, you K1, P1 and repeat. You will be knitting the purl side of the stitches, and purling the knit side of the stitches. It is easy to follow because you will see that if you come to a V you will purl it, and if you come to a bump, you will knit it. The third section is garter stitch.
Garter stitch is when each and every row is knitted. No purls allowed! This gives a stripey texture to your knitting, as you can see the Vs AND the bumps in rows. You are seeing both the front of the knit stitches and the back of the knit stitches. The fourth section is ribbing.
Ribbing is accomplished the same as in seed stitch for the first row: K1, P1 and repeat. However, for the second row, the pattern is P1, K1 and repeat. In this case you are purling the purl stitches, and knitting the knit stitches. When you come to a v, knit it, and when you come to a bump, purl it. This creates a vertical stripe effect and is often used on the cuffs of socks, sweaters and mittens because it has a lovely stretchy quality. After the ribbing, I did several more rows of stockinette and then some seed stitch again. These progress left to right in the photo below.

Wednesday, February 9, 2011
Where do I go for Knitting Help?
I have been knitting up a storm lately and I have to tell you that it has a lot to do with a great yarn shop where I can go to vent, ask, share and learn. I wanted to tell you about Mrs. I's Yarn Parlor in Osceola WI. The owner is Linda, Mrs. I herself, someone I've known for a while, and she is a fabulous knitter and teacher! Check out her website at http://www.yarnparlor.com/ and you can get all the details on her fabulous shop!
Monday, January 31, 2011
Felted Acorn

I made this felted acorn for my friend Linda for her birthday. I got the pattern from a free Ravlery download. It was really easy and fun to make! I used my computer to create the tag, and it reads "When this you see, remember me," and on the other side, "Happy Birthday Linda" with the date. I also added beaded trim, for a little embellishment and as a reminder of the beaded jewelry we've made together.
 I collect acorns, and Linda is, unfortunately for me, due to move out of state. So I gave this to her as a reminder of all of our fun times together. She loves it and has it displayed in her home. I am flattered by this, as she is a wonderfully talented knitter, and has helped me with many projects! Thank you Linda - I'm glad you like your knitty gift!
Thursday, January 27, 2011
Knitty Bitty

I used Lana Bambu (Bamboo/Wool blend,) color 11. I love it. It turned out really well, and since I am a relatively new knitter, I am pleased and proud of my creation, and love how it looks on my coat. It looks better there, than on my guest bathroom towel rack, but that's a great way to photograph it since it was nice and bright in there, so...
There's my Knitty Bitty post! Have a great day!
Monday, January 24, 2011
SUPERBOWL!!!
This Wisconsin girl is thrilled that her precious Green Bay Packers are going to the SUPERBOWL!!!! Good luck to both teams, and may the Packers win! Hmmmm, maybe I need to make a Packers quilt....I'll mull it over between victory dances! Have a great day!
Monday, January 17, 2011
Two More Selvage Edge Ideas

My youngest son has a patriotic room, and since selvage edges almost always "read" as white, I thought it would be fun to incorporate them into something for his wall. This is just a start - a top only, but it is something. Some have really funny words on them. My favorite in this one is "good dog." He really likes it!


I had one or two rectangles leftover, so I made them into bookmarks. The fun with these is endless! I used bleached muslin as a foundation, and just pinned and pieced long strips of selvages onto the muslin with white thread, sewn by machine. I overlap the edges slightly, and I don't worry about fraying, because they are so tightly woven.
This last photo shows how I pinned the edges onto the muslin. After this step I cut them into rectangles and used them like regular fabric in my rail fence blocks.
For the bookmarks, I cut a rectangle of polka dot fabric 3/4" or so, too large. I then folded and pressed the edges inward, mitering the corners. I then placed the selvage rectangle on top, and used satin-stitch appliqué to finish it off nice and neatly!
I hope some of you will come up with your own selvage edge projects and post them here!
Thursday, January 13, 2011
Selvages go with everything!

What else can you do with selvage edges? Here is a no-sew project for all you hot glue gun owners out there. I glued random selvages to glass candle holders, purchased at IKEA. They are each uniform in width from top to bottom, an important consideration for this project, as trying to negotiate curves might be regrettable. (Yikes!)
Regular cottons were used, as well as flannels. I enjoy cutting my selvages different widths, and showing some of the fabric prints with the edge in some cases, and I like the inconsistency of this. I did that on the selvage edge tree quilt as well (See previous post.) I think they are extremely charming, and can actually safely be used as candle holders, as the fabric is on the outside, and cotton can withstand high heat. Flameless tea lights, are also an option. Give it a try! Selvages go with everything!!!
Friday, December 17, 2010

Happy Holidays!
I made this tree quilt early in 2010. It is made in a quilt-as-you-go method using various selvage edges - you know, those yards and yards of fabrics that you've tossed in the trash? Yep, I've saved 'em for a couple of years now, and this is the first project that I created using them.
I was inspired by Kay Rindal, a wonderful friend of mine, who is also a member of our quilt guild. She began collecting selvages and sorting them by various categories: color, with and without words, those that have fun phrases and with interesting symbols on them instead of just numbered circles, etc. She created some great blocks and shared them with us at our meeting. Right then and there, I knew I wanted to do this.
Not wanting to take her idea, I just happened
to think of lines of varying length, and VOILA!
A tree appeared in my mind's eye.
I hope you will enjoy this little project and that you'll
send new ideas about selvage edge creations of your own!
Have a great weekend!
Thursday, December 9, 2010
Straight No Chaser: The 12 Days of Christmas (2008 Version)
Check out this version of the 12 days of Christmas! I think you will be surprised and amused! I love it! I have this on my playlist when I am sewing away in the craft room this time of year. Enjoy!
Subscribe to:
Posts (Atom)